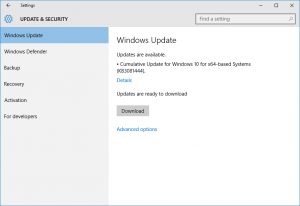
If you’ve been keeping up with the recent news, there are a number of articles pointing to Windows 10 privacy concerns. Last week, new articles have been circulating discussing the updated End-User License Agreement, and what that means for those that might pirate games and software. While many of these settings can be tweaked to avoid too many problems, the most annoying change in Windows 10 by far for me is the automated updates.
If you install Windows 10 on your home PC, Windows Updates are set to download and install automatically without your intervention. This sounds great until you are one of the unlucky people stuck in a boot loop, or your computer deploys a new graphics driver that doesn’t quite work yet. For example, my gaming PC requires a very specific beta ATI driver to play Witcher 3 properly. No matter what box I check, Windows 10 will automatically update this driver for me to the latest release every few days, which does not work well with Witcher 3… or me. The solution so far has been to install the driver each time I wish to play the game. Sweet!
After a lot of frustration and tinkering, it finally dawned on me (perhaps too slowly) to use Windows Group Policy to take control of my environment. Even if your PC is not a part of a Windows Domain, you can still set a Local Policy on your PC to take control of your Windows Update process once again.
- Click Start, type gpedit.msc in the Start Search box, and then press ENTER. Depending on how your Start Menu is configured, you may need to click on Cortona instead to launch the search box.
- Navigate down the Computer Configuration tree to Administrative Templates, and then to Windows Components.
- Select Windows Update on the left panel, which will expose a number of options on the right.
- At this point, you may be compelled to set a number of settings here, but keep in mind that Windows already has default settings for many of these things. We are looking for Configure Automatic Updates and Allow Automatic Updates immediate installation.
- First, let’s Select Configure Automatic Updates. You need to set this policy to Enabled, and then select 2 – Notify for download and notify for install from the drop down box. Users of previous versions of Windows may remember this option, which is no longer visible the normal way in Windows 10.
- Now configure the second policy titled Allow Automatic Updates immediate installation, and set it to Disabled.
All that is left now is to reboot to ensure the settings take affect and let me know how it has worked for you! Ironically enough, if you have updates pending, this reboot will apply them, but once that is done, all will be well. Windows will still nag you when updates are available, but you will be able to choose when to download them and when to install them. The way it should be.


 No Comments »


